31 Dec 2010

a year in review

2010. So another year has gone by like that. I'm sure this year has been eventful and busy for everyone, because it certainly has been for me.

Highlights (good and bad) of the year (in no particular order) would include:
  • Crappy university camp. The event overall was not very good, but I liked the food. And how a roast lamb dinner turned out to be a beef (but I chose the fish dinner that day).

  • The time Eira cooked lamb steaks at my place and how Thangstahh and I were worried if it was edible. Eira wearing an apron was hilarious XD (I can't find the post on my blog, but Eira has it posted with photos here).

  • Worried about getting kicked out of further maths class because I really wasn't up to standard during the first half of the year. But turns out our "strict" teacher was pretty cool and cut us some slack as time passed. But completion of sixty practise exams is an achievement (I'm pretty sure I skipped at least ten).
  • Rushing food tech portfolio on the deadline. So I decided to start two weeks before the deadline and was all-night-ing nearly almost every night. Worst experience ever. Ended up fluking? the graded score. Big thanks to Mrs Roddick and friends in the library for helping me stick and cut the stuff or else I'd never finish it. 

  • Award night ceremony held before exams. Wearing the graduation gown is the most annoying thing ever. I thought the event was pretty good especially the slide show at the end; made people laugh and cry. Took home two awards that night alongside my medal with someone else's name printed on it too...typo error?
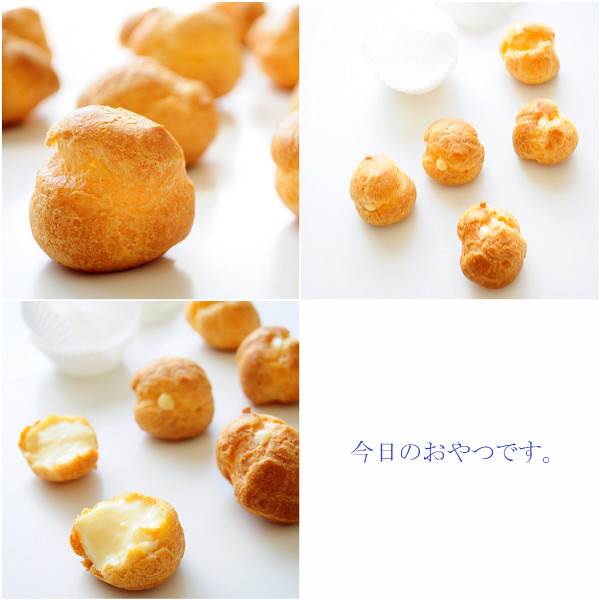
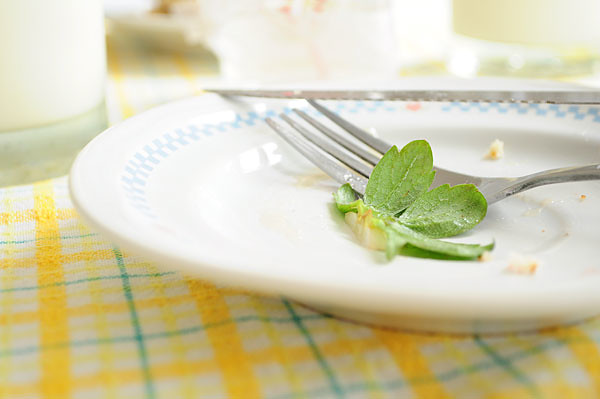
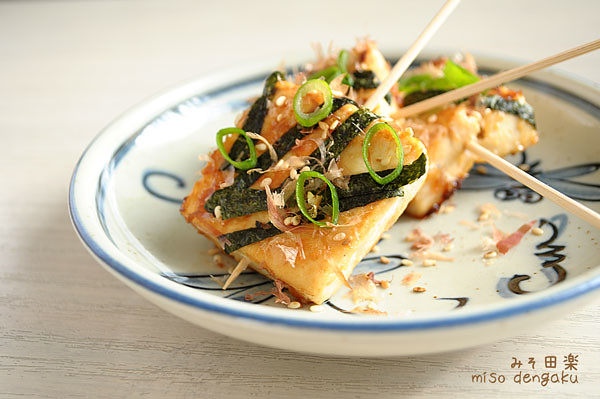
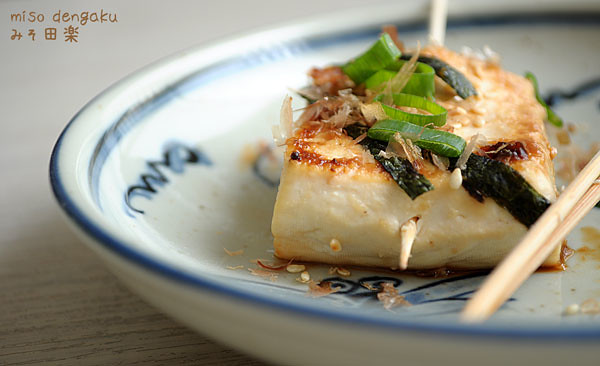
Thank you to Noriko-san from Burning Books for giving me the shiso (right)
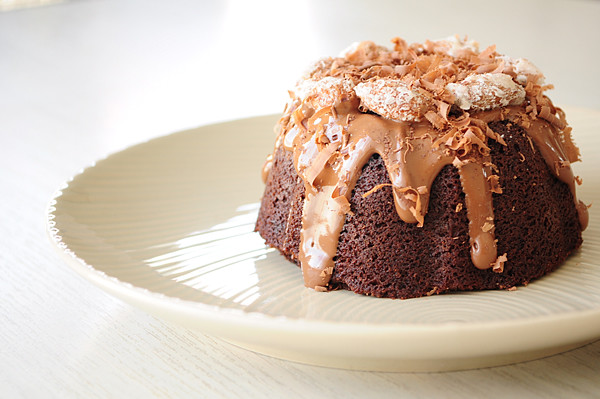
  • Relieved that I finished Thangstahh's birthday cake on time! The chocolate ring cake was a tad dry, but apparently the crepe cake was a winner and was branded the "orgasmic cake". Sounds pretty weird to me, but I think it's a good thing. The recipe for the crepes can be found here, I replaced the cocoa powder with custard powder that day.

  • Meeting two pretty cool Japanese high school students that live in the countryside at the Japanese seminar. We talked quite a bit whilst waiting to complete out oral SACs. Congratulations for getting a 40+ study score :) Too bad I forgot to ask for their email.
  • Practising my Japanese oral with different teachers everyday two weeks before the exam and unlike my Chinese oral exam, none of the questions and answers I prepared was asked :( Thankfully you can make up stuff and the examiners won't even know :) Also surprised that one of the two examiners was non-Japanese.

  • The day of my Japanese written exam, Eira's friend said she was a big fan of my blog (I thought that was kinda weird haha! Sorry!) I was expecting the speakers on the CD for the listening component to be speaking lightning fast like it was for the past three years, but was very surprised that they were speaking slower than usual. I thought the female voice sounded like an older version of Fumi in Mainichi Kaasan. Also that day was the last of my exams, so it was pretty cool :D

  • Having my first article published on crunchyroll! You can read all about it here.

  • The morning when ATAR scores were released. When I logged into MSN that morning, there were six people immediately chatting to me about their results - excitement and nervous-ness! At first I wanted to wait for the statement of results to arrive the following day, but I decided to check online after I asked a friend of mine to check a particular score for me haha. Didn't hit my targeted score and missed by a few marks, but very happy with the result!

  • And of course, ownership of my first dslr camera, the Nikon D5000. I'm still learning how to use it, but I hope to capture some amazing stuff over the next year or so :D Really need to finish two rolls of film too!
And that's all I can think of right now at time of writing. New year resolutions? I never stick to them so I don't think there is a point of making a list except I want to keep a cash book.

Happy new year! All the best for 2011!

21 Dec 2010

toasted muesli

muesli

Pretty funny weather we have here in Melbourne right now. Summer is miraculously not in the scorching 30°C - 40°C, but windy, rainy and cool. You know, I think I can get used to this right now :)

Despite the cool weather, it doesn't stop me from eating ice cream. So it will definitely not deter me from having cereal or muesli with cold milk from the fridge in the morning. I've only bought Vogel's toasted muesli once from the supermarket and was pretty happy with it, until I decided to make my very own batch. Crunching and chewing through honey coated oats and my favourite dried fruits and nuts with a few slices of banana makes my mornings.

You should try some too.

Less than 4 days until Christmas and I still haven't baked anything yet! Thinking about mini gingerbread houses as gifts for now...but might change my mind since I need to become an architect with fine mathematical skills ahem, skills that I do not possess.

Well if I do end up with something, you'll see it here first :)

***

toasted muesli
adapted from Epicure via The Age

ingredients:
makes around 4-5 cups

  • 2 cups wholegrain rolled oats
  • 1/2 cup coconut flakes (I used shredded coconut)
  • 1/2 cup natural almonds
  • 1/4 cup sunflower seeds
    (I used 1/4 cup of each: whole almonds, almond flakes, pepitas, pistachios, walnuts)
  • 1 tsp ground ginger (omitted)
  • 1 tsp ground cinnamon (omitted)
  • 1/2 cup maple syrup (I used warmed honey)
  • 1 Tb vegetable oil
  • 1 cup mixed dried fruits of your choice (sultanas, cranberries, apricots - chopped etc.)

method:

  1. Preheat oven to 180°C.

  2. Mix the oats, coconut, nuts and seeds and spices, syrup and oil in a large bowl.
    Spread mixture out on a large baking tray.

  3. Bake in oven for about 25 minutes, stirring to redistribute after about 10 minutes.
    Remove from the oven and cool on tray.

  4. Mix together with your choice of dried fruits.
    Store in airtight jar. (I put my in the fridge to retain crispiness.)

15 Dec 2010

update

cookies 01

Haven't blogged in ages! Actually, I haven't updated anything aside from twitter really. I recently got a part time job and when I'm done with work it's been pretty much just kick back and chillax at home, playing games (Kingdom Hearts 358/2 Days on Nintendo DS if you were curious) or catching up with friends via msn.

Pretty much been doing kitchen hand stuff; prepping, cleaning, assembling the dishes etc. but nothing in relation to cooking really. Tiring since I'm on my feet all day, but I guess it helps kill time. And seeing food all day makes me kind of sick of eating or even

Just recently, all year twelve students in Victoria received their ATAR which pretty much determines future education and institution in which they'll be studying at. I made it to the clearly in rank of my initial first preference (now second preference), but since I changed it last night, I'm close to the clearly in rank of my current first preference. In other words, in middle band status at the moment. Worse comes to worse, I'll just go for the second preference :)

Peace of mind.

cookies 02

3 Dec 2010

creamy pasta bake

Photobucket

One of my friends, Doug asked me to make some sort of creamy pasta, so he could make it himself. I've never made creamy pasta before (Continental pasta sauce packets, white sauce, cheese sauce don't count) except maybe the time I tried to make carbonara and this creamy mushroom sauce for a pie...it didn't work that well...

Anyway, there was this new Philadelphia product that I wanted to try since it claimed it could withstand heat and won't curdle, which I was the problem when I used thickened cream. Plus since it was a cream substitute, it's much healthier than using cream.

The cream substitute looked and felt like spreadable cream cheese and it did in fact work, and really well too! Only one crap photo because baked pasta should be eaten piping hot :) No time for styling ;D haha what an excuse!

***

creamy pasta bake

ingredients:
serves 2 - 4

  • 1 cup short length pasta (I used elbow pasta)
  • 3 stalks asparagus, cut into smallish pieces and blanched
  • 1 onion, sliced
  • 3 dried shiitake mushrooms, soaked overnight, excess water squeezed out and sliced
  • 3 slices short cut bacon, cut into smallish squares
  • 1 cup (250 ml) Philadelphia cream for cooking (or thickened cream)
  • 1/4 cup grated parmesan cheese
    (I bought a block of parmesan and grated it myself, I didn't use the powdery parmesan sold in packets)
  • salt and pepper
  • oil
  • extra grated parmesan and mozzarella cheese

Note: I used asparagus, onion, shiitake mushrooms, and bacon as the fillings as they were the ingredients I had on hand. Use your favourite ingredients that's suitable for this dish :)

method:

  1. Cook the pasta according to the packet's instructions.
    Rinse in cold water and drain.

  2. Heat a little bit of oil in a non stick pan and saute onions until lightly brown and soft.
    Add the bacon and saute until lightly brown.
    Add the asparagus and shiitake and saute for approxiamately 1 minute.

  3. Add the cream and cheese and stir though to combine.
    Add the pasta and coat the pasta with the creamy sauce.
    Season well with salt and pepper.

  4. Transfer pasta to a baking dish, top with grated cheese and bake in the oven at 200°C until cheese has melted and turned golden brown (about 15 minutes).

30 Nov 2010

how to update: choux a la creme

cream puffs :)

Baking cream puffs was once a very intimidating thing for me to do. The most frustrating thing I found about making the choux pastry is probably when the choux has risen in the oven, only to find them deflating when taking them out to cool.

After more than half a year of baking them, they're not so hard to make after all! When I made them at school, they were pretty popular and every time friends come over, I end up baking a batch to share. Though, Mrs Roddick always seems to enjoy eating the creme patisserie more :P Just waiting for Mrs Roddick and Doodie to have time to come over to bake a croquembouche!

I've come up with another set of mumble jumbo notes (improved version) for my self reference. If you're interested, my first set of notes can be found here.

***

  • 1 egg (+ 1 egg yolk, if needed) per batch
  • Right consistency - firm, does not fall off the spoon
  • Pipe dough "tall", approx. 3 cm strip / diameter
  • Bake in the oven for 200°C for 20 minutes, lower temperate to 150°C and further bake for another 20 minutes
  • Creme patisserie; 2 yolk custard and 150 ml cream, whipped

19 Nov 2010

maple syrup pancakes + mixed berry compote

pancake party +2
[Scroll down for recipe if you don't want to read useless rambles]

Graduated. Exams finished; Monday actually. The time of our lives and yet everyone I know is busy doing nothing or being unsuccessful in part time job hunting, including me.

But I haven't been exactly doing nothing. I've returned to school a few times this week distributing appreciation gifts, hassling Year 11s to buy my text books (and made $65 today) and catching up with fellow Year 12s who drop in.

Going to school is actually more interesting than staying home actually. Fairly interesting reactions from the juniors when Murasaki and I barricaded the study room to set up a "store".
DSC_2996
Hrm, so what's with the pancakes and compote? They're nothing new really, but I procrastinated and made a ton of pancakes during my exam period :D And now I'm too lazy to bake or cook anything at the moment.

Who knew having the time of our lives would be so boring. I need something to do.
DSC_2995
***
mixed berry compote
ingredients:makes 2 small servings
  • 1 packet (75 g) frozen mixed berries
  • 2 tsp sugar
  • 1 tsp lemon juice
  • 1 - 2 Tb water
method:
  1. Place all the ingredients into a small pot.
  2. Stir constantly for 8 - 10 minutes on low heat.
  3. When the berries are soft, and when liquids are slightly thick, the compote is ready.
    Cool and refrigerate for later use.
* Mix with plain yogurt and freeze for a frozen treat.
***
maple syrup pancakes
ingredients:
makes 10 mini pancakes
  • 1 egg
  • 3 Tb maple flavoured syrup
  • 75 ml milk
  • 1/2 Tb unsalted butter, melted
  • 75 g self raising flour, sifted
  • 3/4 tsp baking powder
  • vanilla ice cream and mixed berry compote, to serve
method:
  1. Using a whisk, beat the egg and maple syrup until frothy.
    Whisk while adding the milk and melted butter / margarine.
  2. Add the sifted flour, baking powder and whisk to make a smooth and runny batter.
  3. Heat a non stick frying pan and add a small piece of butter / drizzle of oil.
    Wipe fat off with kitchen paper and reserve. Turn heat to a medium high*.
  4. Add 1/4 cup of batter and flip with a spatula when many bubbles appear on the surface.
    Cook other side until golden.
  5. Wipe the frying pan with the kitchen paper and repeat step 4 until there is no more batter.
  6. To serve, add a scoop of vanilla ice cream and some mixed berry compote.

* For the heat use, I generally start of using a medium high heat and lowering it each time as the pan gets hotter.
* To make even coloured pancakes, turn heat to medium high then to low. Cook pancakes slowly over low heat.

13 Nov 2010

food for thought: ohagi

Crunchyroll is an online video service and community that offers full-length episodes and movies of the very best in Japanese anime and Asian entertainment. Crunchyroll's content is provided by Asian media leaders including TV TOKYO, Shueisha, Fuji Creative Corporation, Pony Canyon, Yomiuri Telecasting Corporation, Toei Animation, Gonzo, Munhwa Broadcasting of America, and many others. Extract from Crunchyroll's about page.

My ultimate goal of this blog is to inspire and motivate teenagers to take up cooking as a hobby.

Crunchyroll has a huge online teenage demographic base as well younger and older viewers, so since August, I've been submitting in articles to Crunchyroll in relation to 2D food. Basically, I write about food that appears in anime, manga and games and provide a recipe for it in the end.

The first article I submitted way back in August has received the thumbs up and green light to be published in the Crunchyroll newsletter!

If you're interested from the preview screen shot, click here to read more!

* Clicking on any of the links will redirect you to a section of Crunchyroll

2 Nov 2010

pumpkin + cheese scones

breakfast: pumpkin&cheese scones
Recently, one of my Japanese pen friends asked if I was doing anything for Halloween. I did say I was planning to make pumpkin pudding to "celebrate" Halloween, but exam study caught up so I had to ditch the idea :( There's always next year!
I gave candy to trick-or-treaters, but when I tried to give them more they ran away XD Which reminds me of the time when these two Asian guys told my friends and I to take more freebies at UoM's open day - we bolted!
Because I woke up early on a Melbourne Cup public holiday, I felt like experimenting and baked scones. If you ever make these, you have to eat them straight from the oven or at the very least while they are still warm! They are light and fluffy :)
Back to study. Tomorrow, after my maths exam, I shall make a bonfire and burn recycle all maths related work!!!
***
pumpkin + cheese scones
ingredients:makes 9
  • 1 1/2 cups self raising flour, sifted
  • 50 g cold unsalted butter, cut into small cubes
  • 1/4 cup sultanas (optional)
  • 1/4 cup walnuts, chopped (optional)
  • 3/4 cup pumpkin, steamed or boiled until soft and roughly mashed
  • milk
  • grated cheese (I used mozzarella)
  • salt and pepper, to taste
method:
  1. Preheat oven to 200°C conventional.
    Line a baking tray with grease proof paper.

  2. Put sifted flour into a bowl, add the butter cubes and rub butter with fingertips until they resemble fine crumbs.

  3. Add sultanas, walnut pieces and a handful of cheese.
    Mix through flour.

  4. Add the mashed pumpkin and using your hands, gently bring together to form a dough.
    If the mixture is dry, add 2 Tb of milk at a time and stir through with a knife to make a soft dough.

  5. Transfer to a lightly floured plate / chopping board and gently knead so the dough comes together.
    Pat dough to approx. 5 cm thick and cut rounds using a floured cutter.
    Gather off cuts and gently press them together and to combine and cut more rounds using a floured cutter.

  6. Place them fairly close on a lined baking tray and top with extra cheese.

  7. Bake for 15 minutes or until cheese has melted and is golden.

29 Oct 2010

cheat's chocolate croissants

Photobucket

Inspired by the chocolate croissants in the bakeries I made a cheat's version of one on the weekend for my study snack.

The method I typed out is how I did it, but you can always skip step 2 and place the liquefied ganache into the toasted croissant.

***

cheat's chocolate croissants

ingredients:
serves 1-2

  • 2 store bought croissants
  • 100 g chocolate (I used a mix of milk and dark chocolate)
  • 100 ml cream (I used thickened cream)

Note: You will end up with more ganache than you need, so keep it chilled.

method:

  1. Making the ganache:
    Put chocolate in a dry heat proof bowl.
    Bring cream to the boil in a small saucepan and pour immediately into the bowl with chocolate.
    Stir until chocolate has melted.*
    Pour in a heat proof container and cool in the fridge until hardened.

  2. Scoop small pieces of the ganache.
    Cut the croissants in half and place the ganache inside.
    Toast in a small oven toaster until ganache has melted.

* If the chocolate has not fully melted, place over a bain marie and stir until melted.

7 Oct 2010

banana quatre-quarts

banana quatre-quarts +1
A relatively simple cake to make, quarte-quarts is a French pound cake that means "four quarters" which comes from the fact that the four main ingredients (butter, sugar, flour and eggs) are added in to a 1:1:1:1 ratio.
banana quatre-quarts
And because I had some ripe bananas sitting on the bench top, I added in the same ratio of mashed bananas. So technically, it's not a traditional quatre-quarts. Probably along the lines of a banana pound cake or banana cake.
P.S This will be the last post until after exams (mine finishes on the 15th November). I have an oral exam exactly 1 week away from today and written exams start in 1 1/2 weeks after that D: Whether you have been a reader from the beginning, a recent reader, or even a silent reader, thank you for your support :) By the way, a few photos here :D
試験 ( の勉強 ) のために今日から11月15日までブログ更新がありません。
今まで、ありがとうございました。
***
banana quatre-quarts
adapted from Cooking Guide DS
ingredients:
makes 3 mini loaves
  • 130 g unsalted butter, softened
  • 100 g caster sugar (original was 130 g)
  • 130 g eggs, beaten (I used 2 large eggs weighing 120 g)
  • 130 g plain flour, sifted
  • 1 tsp baking powder, sifted
  • dash of vanilla essence
  • 130 g mashed bananas (approximately 2 small bananas)
  • 1/2 Tb lemon juice, mixed into the mashed bananas
- If you want to make the original quatre-quarts, omit the bananas and lemon juice
oven:
175°C conventional
method:
  1. Preheat oven.
    Grease or line baking tins with greaseproof paper.
  2. Cream butter and sugar until pale and fluffy.
  3. Gradually add in the beaten eggs and vanilla.
    Beat well to combine.
  4. Fold in the sifted flour and baking powder.
  5. Fold in the mashed bananas and lemon juice.
  6. Transfer batter to greased / lined baking tins and smooth tops.
    Add walnut pieces on top if desired.
  7. Bake for 25 minutes or until cake is golden and skewer comes out clean when inserted.

27 Sept 2010

quanjude + teriyaki sauce

enoki filled beef rolls +2
Earlier last month, my family and I dined at Melbourne's Quanjude (the main branch is in China) for dinner. Actually the main purpose was to try their Peking duck, since they are famously known as "the duck specialist".
It was a tasty experience despite staff calling us at 10 PM confirming the reservations. I've also eaten this dish in Malaysia and Taiwan. From my experience in Malaysia they only slice the crispy skin for the wrapping. The other part of the duck is usually deboned and mixed with stir fry noodles and chopped up. Same with the roast pig, only the crispy skin is served.
Photobucket
The chef thinly slicing a freshly roasted Peking duck
food03
We also tried some prawn, wagyu, hot pot dishes as well and one of the dishes that caught my uncle and dad's eye was the thinly sliced wagyu wrapped around enoki mushrooms which were priced at around $4~$5 per roll. Dad remade this ate home with scotch fillet (seen above) whilst my uncle and I had a teriyaki sauce cook off.
Apparently my sauce was better because it was sweeter which matched the flavour at the restaurant, but Uncle's sauce was good too. I reckon they tasted pretty similar except Uncle's sauce had a dash of chili powder added to it. I don't know his secret recipe but I'll post my not so secret recipe :P
***
teriyaki sauce
ingredients:
  • 100 ml mirin
  • 100 ml cooking sake
  • 100 ml soy sauce (Kikkoman)
  • 25 grams sugar
method:
  1. Place all ingredients into a small saucepan and bring to a boil stirring so the sugar dissolves. Lower the heat to simmer and let it reduce by a quarter.
  2. To thicken, dissolve 1 tsp of potato starch into 2 tsp of water and add it to the boiling liquid.
    Stir until thickens.
***
Note: Uncle said it will taste better if I add a tad more sake to it. Will do more experimenting on it. But for now, this sauce is good enough for me to eat it with plain rice :D

22 Sept 2010

strawberry compote

ichigo +1
Ah! Photos look so much better without shadows :)

Compared to other months, sales of strawberries have peaked! Currently, we buy around 3 -5 punnets of strawberries each week because they are so sweet now :D Did I mention they're also cheaper? Well, that's the only perk in the upcoming Spring. Definitely not looking forward to the heat!

french toast & strawberry compote +1
The idea of creme brulee french toast was stuck in my head since Christine mentioned it a while back. Instead of the usual mix I dip the thick sandwich slices in, I tried to dipping it in raw creme brulee mix instead. The result? There wasn't really a difference except that the cream flavour was more prominent (even though I did a 50% cream and milk ratio).

But never mind that, it was still a good snack to the point where my sister wanted a slice o_o Now that's RARE!

The recipe for this week is the strawberry compote that went with the french toast. Nothing too hard and doesn't take too long to make a small batch and add it to your favourite sweet breakfast or brunch!

***

strawberry compote

ingredients:
makes 2 small servings (about 125 ml)
  • 1/2 punnet strawberries, hulls removed and quartered
  • 2 tsp sugar
  • 1 tsp lemon juice

method:
  1. Place all the ingredients into a small pot.
  2. Stir constantly for 8 - 10 minutes on low heat.
  3. When the strawberries are soft, squash them roughly with a wooden spoon.
    When the liquids are slightly thick, the compote is ready.
    Cool and refrigerate for later use.
* Mix with plain yogurt and freeze for a frozen treat.

toast

17 Sept 2010

caramelized almonds + nut and crunch brownies

brownie cake
I do feel I have an attachment to the melt and mix method whether for cookies, muffins and cakes and making scones with either the rubbing in method or "whisking" method (for cream scones). Reason being, scones were the very, very first baked food I made by myself at school, 4 years ago. As for the melt and mix method? was because of this very brownie recipe.

All I can remember is that this brownie "cake" we made at school won the hearts of many, that day. Even the guys like it! I wouldn't see why we didn't. The cake had a crunchy crust, a moist and soft innards. Dusted with unlimited amount of icing sugar, we became sugar-high after a first bite. Good times!
I recently asked Heolin for the recipe (because I lost mine, very organised I know :P) and 4 years later, it's still a winner in my books.

This time round, I tweaked the recipe just a bit!

Unfortunately I did not have any walnuts in the pantry, and didn't like the idea of almonds in the brownies so I decided to roast some almonds. I was thinking of caramelizing them with hard caramel, but decided not to as making hard caramel is the most disastrous thing that can possibly ruin my mood and leave me with a pot hardened with caramel. Fortunately, I came across two recipes which saved me from chaos :)

almonds
Dagmar's recipe was another winner! The almonds were crunchy and slightly sweet. It reminded me of the warm honey roasted cashews and peanuts my dad used to buy. I loved them, but always ended up with a coughing fit eating them as they got stuck and irritated my throat. These almonds were no exception, but I had a mug of water in one hand and a small plate of these in another hand ;)

***

caramelised almonds
adapted from A cat in the kitchen

***

nut and crunch brownies
adapted from food tech class and Heolin's email

oven:190°C conventional

ingredients:
makes a 20 cm cake
  • 1/2 cup unsalted butter
  • 1 cup brown sugar, firmly packed
  • 2 eggs, beaten
  • 1 tsp vanilla essence
  • 1/2 cup dutch processed cocoa
  • 3/4 cup self raising flour
  • 1/4 cup chopped walnuts, optional
method:
  1. Preheat oven to 190°C. Grease a cake tin with butter or line with baking paper.
  2. In a small saucepan, melt the butter and brown sugar.
    Leave to cool. Meanwhile sift the flour and cocoa powder.
  3. When the melted mixture is cool, whisk in the eggs and vanilla essence.
  4. Add the sifted flour and cocoa powder and mix to combine.
    Add in the chopped walnuts, if using. Mix well.
  5. Pour the contents of the pot into the greased or lined tin.
    Bake for 20 minutes or until skewer comes out clean when inserted.
    (If baking time increases, tent (cover) cake with aluminium foil if necessary)
    Invert cake and cool.
Happy 18th Birthday Thangstahh!!

10 Sept 2010

strawberry shortcake

strawberry shortcake +1

The last of my eight items for my food tech folio. Now that the fun part is over, I have to continue the boring theory component. If only the food tech exam was a practical...now that would be FUN! Too bad my cake got slightly squished from the transportation process :(

By the way, I will be decorating more cakes, so watch this space :)

Random fact for the day: I rarely listen to English songs, but I discovered ELLEGARDEN yesterday! They're a Japanese rock band that sings in English. Unfortunately they're on hiatus at the moment. One of their songs, [Salamander] describes how I feel right now about the upcoming exams...

how I feel inside
losing my concentration
now I need more time, somehow I'll make it through
I just need more time

strawberry shortcake

31 Aug 2010

hiatus

cupcakes

recipe: one pot moist chocolate muffins inspired by Christine's blog post and flickr photo

Check out h.tea's muffins too :)

I thought about putting my blog on hold for a period of two and a half months due to upcoming exam revision and exams, but because it has become a habit of mine to bake / cook every weekend, I've decided to minimise that time to compensate for some blogging. From now, blog posts will be limited to around once a week.

And I'm back on twitter! yay!

mini cupcakes :) +1

25 Aug 2010

sultana oat cookies

sultana oat cookies
I was cleaning out my room a few weekends ago and found a folder of ripped out recipes from supermarket recipes. There weren't a lot, so I decided to make what seemed the easiest of them all. Cookies that require only a melt and mix method (like this, this and this) are by far my favourite because they are EASY! I don't even know how long I've been without creaming any butter and sugar :D

Aside from the butter content, I would say these cookies are quite healthy in terms of the amount and variety of wheat products. I like these cookies and would make them again :D
***
sultana oat cookies
recipe adapted from a 2009 Coles magazine
ingredients:

makes 18 (I made around 40, 1 Tb cookies)

  • 1 cup self-raising flour
    (I used self-raising wholemeal flour)
  • 1 cup Carman's Toasted Muesli
    (I used Vogel's premium oven crisp fruit and nut muesli)
  • 1 tsp of ground cinnamon (if not using Carman's toasted muesli)
  • 1 cup Sunbeam Sultanas
    (I used golden sultanas)
  • 3/4 cup rolled oats
  • 1/2 cup brown sugar
  • 125 g butter, melted
    (I used unsalted butter)
  • 1 egg, lightly beaten
  • 1 Tb honey
method:
  1. Preheat oven to 190°C or 170°C fan.
    Line two baking trays with baking paper.

  2. Place dry ingredients in a large bowl and toss to combine.
    Combine butter, egg and honey and add to dry ingredients.
    Mix well.

  3. Drop 2 Tb (I did 1 Tb) of mixture onto prepared trays.
    Press lightly with the back of a fork.
    Bake for 10 - 12 minutes, until golden.
    Cool on trays before storing in an airtight container.
DSC_2549

13 Aug 2010

croquettes (コロッケ)

croquettes
Many thanks to Uncle E who helped with the vegetables arrangement :)
More than half a year ago, it took me a whole night and help from my parents to get these croquettes done. Now I can safely say I can make them all by myself :) Although the frying part was quite scary... still is!
Anyway, made these again at school and they were somehow a big hit among my friends...Old Biscuit had around three?! Mrs Roddick and Douglas suggested I add cheese in them next time. Next time...

10 Aug 2010

mini strawberry pancakes

mini strawberry pancakes
A table for two, but no one to share with :( I'll invite someone over next time :)
Since I have already established I LOVE breakfasts in a previous post, I shall refrain from repeating myself.

Two weeks ago, the food tech students in my school have just started production in regards to the design folio. As I had time to spare, I was being a busy body looking at what kind of foods other people were making. They were busy making a variety of foods; exotic mango and coconut prawns, sweet and sour pork, turkish delight, honeycomb cake, cupcakes just to name a few. The girl who uses the stove top next to mine was making pancakes!
strawberry pancakes
Seeing her make pancakes reminded me of ラブソーライフ, a manga chapter featured in the April 2009 花とゆめ; a birthday gift from my friends at Chinese school last year.
Anyway the chapter was about Shiharu, a 16 year old babysitter trying to make pancakes with the two two-year-old rascals Aoi and Akane. In one scene, Akane decides to make strawberry pancakes by throwing in whole strawberries inside -_-"
Although inspired by the idea of having strawberries inside pancakes, I did not add whole strawberries to the batter :P And I think these pancakes are the best ever!!
***
strawberry pancakes
mini strawberry pancakesadapted from my previous recipe
ingredients:makes 10 ~ 12 mini pancakes
  • 1 egg
  • 2 1/2 Tb caster sugar
  • 75 ml milk
  • 1 1/2 Tb unsalted butter / margarine, melted
  • dash of vanilla essence
  • 75 g self raising flour, sifted
  • 3/4 tsp baking powder, sifted
  • 4 strawberries, chopped into small pieces
  • unsalted butter / oil for frying
method:
  1. Using a whisk, beat the egg and sugar until frothy.
    Whisk while adding the milk, melted butter / margarine and vanilla essence.

  2. Add the sifted flour, baking powder and strawberry pieces and whisk to make a smooth and runny batter.

  3. Heat a non stick frying pan and add a small piece of butter / drizzle of oil.
    Wipe fat off with kitchen paper and reserve. Turn heat to a medium high*.

  4. Add 2 Tb of batter and flip with a spatula when many bubbles appear on the surface.
    Cook other side until golden.

  5. Wipe the frying pan with the kitchen paper and repeat step 4 until there is no more batter.

  6. To serve, drizzle pancakes with honey and top with half a strawberry.
* For the heat use, I generally start of using a medium high heat and lowering it each time as the pan gets hotter.
strawberry pancakes

23 Jul 2010

シュークリーム

三丁目の夕日

悪いなったシュークリームのシーン ・ rancid cream puffs scene

I started watching the Japanese movie ALWAYS 三丁目の夕日 (Always - Sunset on Third Street) last year and never got to finish it. I recently watched the remaining 15 minutes of it and it was an unbelivably touching movie!! The scene where Junnosuke and Chagawa reunite was very cliche, but I think it was my favourite scene in the movie!

What made this movie different to other movies was that it was set in the industrial period of Japan (construction of Tokyo Tower) which gives it a nostalgic feel to the people who grew up in that era. As for me, it's pretty obvious I didn't grow up in that era, nor was I born or brought up in Japan but I loved how everyone became satisfied with something very little.

Inspired by the rancid cream puffs scene, I set out on my assignment to make cream puffs! After the cream puff shells decided to deflate on me last time, I decided to use a different recipe and judge the baking time and temperature based on instinct. Like the first time I baked cream puffs using this method, my cream puffs did not deflate!

In my opinion, cream puffs are one of the easier bakes, but it is also one of those bakes that can fail quite easily.

Not sure if it's going to work out again though. But after the cream puff shells were golden and puffed to the maximum, I took them out and used a sharp knife to cut out a "top". I removed all the raw dough and put the cream puff shells and "tops" back in the oven to bake at a low temperature until the cream puff shells were dry.

The cream puffs shells are not completely, perfectly round yet, but I'm sure that has got to do with the way I pipe the pastry dough. More experimenting next week!

使ったレシピはこちらへどうぞ→
Cpicon 基本のシュー生地 by ゆきらいん

シュークリーム

20 Jul 2010

spaghetti and meatballs

spaghetti and meatballs
I tried to cover the burnt meatball with the rosemary...haha :)

Into the second week of school, term three, which is considered our last term of the year before five weeks of intense study (two weeks holidays, three weeks school) in preparation of the dreaded end of year examinations. Time flies doesn't it? Whoever said Year 12 was fun lied!
With upcoming SACS, tests, seminars and whatever else that's going to be thrown at us, year 12 students, I'm sure everyone is going all out to try to achieve their desired score to achieve their dream.
DSC_2397
On to the food; this was a rather simple dish I made adapting two past recipes; frikadellen (german meat patties) and the tomato sauce from the chicken parmigiana.
On a slightly unrelated note, but exciting news, some of my recent photos have been selected to be published in the upcoming Tsunagaaru leaflet which is to be given out to students and teachers in photography clubs in the National High School Photo Event in Japan. I'm not sure how many are being used, but I post again when I receive the leaflets in the mail :)
***
ingredient list for the frikadellen recipe:makes approximately 12 patties
  • 1 onion
  • 1 clove garlic
  • 1 Tb oil
  • 2 slices of bread
  • water to soak bread
  • 1 carrot, coarsely grated
  • 350 g pork mince
  • 250 g beef mince
  • salt and pepper, black pepper, seasoning
  • 1 egg
Method is the same as the previous recipe, besides adding the coarsely grated carrot in step 3 and shaping the meat differently (cooking time varies as well).

18 Jul 2010

hot chocolate + french toast

breakfast

Breakfast is no doubt my favourite meal of the day. I reckon a good breakfast is a good kick start to the day. Over the years, I have rarely skipped breakfast and over the years, the only thing that hasn't changed is breakfast ALWAYS includes a glass of milk or some other beverage depending on whatever breakfast is.

Today was indifferent.

I suppose today's breakfast of french toast isn't what I would usually eat or make because I wouldn't wake up on rushed weekday to make it and I'd be happy to eat eggs on the weekends every day!

Earliest memory of french toast would be in Malaysia. My uncle would just dip the bread slices in beaten eggs and fry them in a wok full of oil and us, kids would then eat them with sugar. I remember I had six at one time. Good ol' days.

Hot chocolate isn't really my thing, but I'm all in for the marshmallows :)

***

hot chocolate
simple essentials - chocolate by Donna Hay

DSC_2386

If you're going to make it yourself, you might as well have the best, so it's important to use high-quality chocolate. Heat 1 cup (250 ml) milk per person in a small saucepan until it's warmed through and close to boiling. Then add 1 tablespoon grated chocolate for each serving to the saucepan. If you're making for one, you can pour the hot milk directly onto the chocolate in a cup and stir. Serve with marshmallows if desired.

I grated approxiamately 10 g of dark chocolate with 85% cocoa solids and added 1 tsp of kuromitsu into mine. Needs more chocolate :D

***

cinnamon and banana french toast
original recipe by me

ingredients:
serves 1 - 2; egg mixture is enough to coat 3 thick sandwich slices

  • 1 egg
  • 100 ml milk
  • 1 1/2 Tb thick cream
  • 1/4 - 1 tsp ground cinnamon
    (I added 1/4 tsp of cinnamon and the flavour wasn't really there, so I will add more next time)
  • 1 Tb brown sugar
  • 3 thick sandwich slices
  • 1 tsp unsalted butter
  • 1 banana, peeled and sliced or mashed
  • icing sugar and honey

method:

  1. Add egg, milk, cream, ground cinnamon and brown sugar into a mixing bowl. Whisk to combine.

  2. Heat a non-stick frying pan and melt the butter. Wipe down the butter with kitchen paper and reserve it for later.

  3. Dip a sandwich in the egg mixture and coat well on both sides.

  4. Pan fry on the first side until golden brown and flip. Cook until the other side is golden.

  5. Repeat steps 3 and 4 until there is no more egg mixture ensuring you wipe down the non-stick pan with the kitchen paper coated with butter each time you finish one toast.

  6. Layer with sliced / mashed bananas, dust icing sugar on top and serve with honey.

DSC_2392

14 Jul 2010

cheat's chicken parmigiana

lunch: cheat's chicken parmigiana
Second to Asian cuisine, I love Italian food especially pasta! Great food, but I am no expert in making them. I remember eating chicken parmigiana earlier in the year at La Porchetta where it was around $20 for the whole meal. Supposedly pretty expensive as you can buy a filling meal somewhere else for half the price. But had a satisfying lunch that day.

During the holidays, mum usually prepares lunch of some sort where we just have to heat it up in the microwave. I did tell her several times not to make lunch for me since I was going to make it myself. On the day she fried chicken schnitzels, I didn't just want to eat schnitzels with tomato sauce so I decide to add something to it for a better meal :) Same thing when mum pan fried some dumplings, I just turned them into dumpling ramen (or soba in my case).

The chicken parmigiana is not very traditional or even close to authenic or restaurant quality by it does have the three main coponents of the crumbed chicken schnitzel, tomato sauce and melted cheese on top. But let's just call this a cheap knock-off from the original :D
Oh and the cheat's part, I used store-bought chicken schnitzels instead. Of course, you can crumb the chicken fillets yourself too :)

***
cheat's chicken parmigianaan original recipe by me
ingredients:makes 2 sides or 1 main course
  • 2 small chicken schnitzels
    (you can get them from the local butcher or supermarket)
  • oil for frying
  • 100 g tinned tomatoes
  • 1 tsp tomato paste
  • 1 1/2 tsp brown sugar
    (adding more sugar reduces the acidity of the tomatoes)
  • pinch of dried Italian herbs
  • grated pizza cheese
  • grated parmesan cheese, optional
oven:
200 degrees Celcius

method:
1. Heat oil in a pan and deep fry chicken schnitzels until crunchy and golden. Drain excess oil on kitchen paper. Transfer warm chicken schnitzels to a baking tray lined with foil and baking paper.

2. Heat a non stick frying pan and add the tinned tomatoes, tomato paste, brown sugar and dried Italian herbs. Cook over medium heat until sauce thickens. Transfer sauce to a bowl.

3. Spread the thick tomato sauce on top of the schnitzel ensuring that each schnitzel is covered with the sauce.

DSC_2377
3. Top with some grated pizza cheese and a sprinkle of parmesan cheese.

4. Bake in a pre-heated oven for 7 - 10 minutes or until cheese has melted. Serve hot!

DSC_2382

11 Jul 2010

みそ田楽 miso dengaku

みそ田楽 miso dengaku
At first I called these miso yaki tofu, but a Japanese photographer, nasufumitaka on flickr also said they were known as miso dengaku. Further research shows they are also called tofu dengaku. Call them whatever you want :) But I don't have a griller, and I didn't want to bake the tofu so this is a less authentic miso dengaku. Nevertheless I think it tastes quite good!

For this recipe, I did not have a recipe I could refer too, but I had tried nasu dengaku (eggplant with sweet miso) earlier in the year in my uncle and aunt's restaurant so I had a good idea of what I wanted it to taste like and how it would look when finished.

Had a test run for the recipe on the Monday when the guys were over and ended up burning quite a few because of the level heat. Don't worry I did try it again with the remaining tofu and changed the method so your one shouldn't burn. Like Thangstahh said, tofu is tasteless (but I still love tofu's plain taste :D) and really depends on the sauce and toppings so you can add more toppings if you want :)
みそ焼き豆腐 miso yaki tofuNotebook drawings inspired by awesome photographer and artist ^^ Christine check out her flickr page too!
If you can read and understand the scribbles in my notebook, I did make small adjustments to it.

***

みそ田楽 miso dengaku
ingredients: serves 2 - 4

500 g firm tofu
2 Tb shiro (white) miso1 2/3 Tb konbu dashi / chicken stock / water
5 tsp sugar (adjust to your own taste)
1 Tb mirinkatsuobushi (shaved bonito), optional
nori strips (cut dried seaweed), optional
sliced spring onion, optional
toasted white sesame seeds, optional

method:
Drain out the water in the tofu and cut into 12 equal sized pieces.

Put the tofu pieces in boiling water and boil for 5 minutes. Drain water and place tofu on kitchen paper to soak up excess water.

Put the shiro miso, konbu dashi / chicken stock, sugar and mirin in a small saucepan. Cook in a medium - low heat until sauce is smooth. Transfer sauce to a small bowl. (You might want to add more sugar if you want your tofu sweeter.)

Heat a non-stick frying pan add the drained tofu pieces and lightly brown them on high heat.

Change heat to medium - low. Using a pastry brush, brush some miso sauce on top of the tofu and flip them. It is important to use a medium - low heat as the sugar content in the sauce will burn easily if you use high heat.
Repeat step 5 until there is no more miso sauce.

Transfer tofu to a plate and sprinkle a combination of katsuobushi, nori strips, sliced spring onion and toasted white sesame seeds.

みそ田楽 miso dengaku