28 Jun 2009

banana walnut muffins


Baked this while waiting for my pizza dough to rise. Didn't want to bake a cake because the margarine at home isn't good for creaming so decided to bake muffins instead. Bought a small bag of Californian walnuts for this and ended up using up the whole bag xD Yup, I'm a walnut freak, but I only like them in cakes and muffins.
***
banana walnut muffins
oven:
170 degrees Celsius
fan forced
ingredients:
makes 12 muffins
  • 1 cup + 1 Tb self raising flour, sifted
  • 1 tsp baking powder, sifted
  • 1 tsp bicarbonate soda, sifted
  • pinch of salt
  • 1/2 cup chopped walnuts
    (plus extra for topping)
  • 2 sugar bananas
  • 1/3 cup sugar/ brown sugar
  • 1/4 cup milk
  • 1 egg
  • 1/3 cup margarine, melted
method:
1. Combine the dry ingredients (self raising flour, baking powder, bicarbonate soda, salt, walnuts) in a large mixing bowl.

2. Slice the bananas and mash them with a fork.


3. Whisk all the wet ingredients (milk, sugar, egg, melted margarine) into the mashed bananas. (I just did it one/two ingredients at a time for photo purposes.)


4. Pour the wet mixture into the flour mix. Fold the wet ingredients into the dry ingredients until everything is just incorporated. DO NOT OVERMIX!

5. Spoon mixture into a muffin cup and top with chopped walnuts.
6. Bake for 20 minutes or until golden and comes out clean when poked with a skewer.

24 Jun 2009

honey joys v2

Like Magster from chinese school telling me to do something with her Old Gold, my mum told me to do something with the box of cornflakes my sister bought for the freebies. So what better to do with cornflakes than honey joys.

Before you (referring to people with braces, like me) just be careful eating these because they are quite crunchy and they WILL get stuck in the nooks and crannies. If you don't have braces, feel free to chomp away!!

By the way, note to Lalarhs, this is very easy even my little sister can do it! ALMOST fail proof, the only flaw I can see you doing is burning the butter, sugar and honey mixture ;)

***
honey joys
adapted from my previous recipe

oven:
150 degrees Celsius
fan forced

ingredients:
makes 24 patty pan sized
  • 5 cups cornflakes
  • 1 cup shredded coconut
  • 100g margarine
  • 4 Tb honey
    + extra for later (optional)
  • 1/3 cup sugar

method:

1. Measure and put cornflakes and shredded coconut into a large mixing bowl. Stir to combine.


2. Melt margarine, sugar and honey in a small saucepan over medium low heat, stirring occasionally until margarine and sugar has melted.

3. Pour melted syrup over cornflakes mix. Stir to combine, making sure cornflakes are well coated in the syrup. (Drizzle extra honey- 2 Tb over cornflakes if desired)

4. Line a baking tray with patty pans and scoop about 2 Tb of cornflakes mix into each case.

5. Bake for 10-15 minutes.

NOTE: Wait until honey joys are cool before eating, because they won't be fully set when taken out from the oven.

100% Australian Owned

After making my cheat's apple crumble a few nights ago, I had a sudden craving for ANZAC biscuits. My crumble consisted of ingredients such as rolled oats and shredded coconut which are two of the core ingredients in ANZAC biscuits. Besides craving for ANZACs, these are probably the best biscuits/cookies I can bake, because I can't bake them. They either get burnt or go incredibly soft the next day. Which is probably why you rarely see any biscuits/cookie posts.
So what exactly is an ANZAC biscuit?
via wikipedia's information

ANZAC biscuits is a sweet biscuit made with very simple ingredients; rolled oats, flour, coconut, butter, golden syrup, bicarbonate soda and boiling water. These cookies are associated with the Australian and New Zealand Army Corps (ANZAC) of WW1 because they were consumed in that time period since many ingredients were scarce and they did not spoil easily. ANZACs are probably a variation of the Scottish oat cakes, possibly via the Scottish influenced city of Dunedin, new Zealand.

Well, I do have a packet of commercialised ANZACs in the pantry, but who needs those when you can make them yourself. The recipe is quite simple; melt and mix method.

***
ANZAC biscuits
adapted from Exclusively Food's Anzac biscuits
later edited by me

oven:
140 degrees
fan forced

ingredients:
makes 21 biscuits
  • 1 cup rolled oats
  • 1 cup plain flour
  • 1 cup desiccated coconut
  • 3/4 cup sugar
  • 1 tsp bicarbonate soda
  • 1 Tb hot water
  • 120g margarine
    (might need some extra later)
  • 2 Tb golden syrup
method:
1. Combine the dry ingredients of flour, sugar, desiccated coconut and rolled oats in a large mixing bowl. Stir to combine.
2. Dissolve the bicarbonate soda in hot water.

3. Melt margarine and golden syrup over a low heat, stirring occasionally. When margarine has melted take off heat.


4. Stir in the bicarbonate soda water into the syrup mixture. The syrup mixture should be frothy on top.


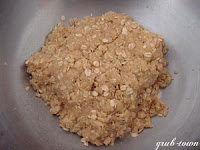
5. Pour the syrup into the dry ingredients. Stir with a wooden spoon to combine ingredients all together.
NOTE: If mixture doesn't stick together and is crumbly, melt 1 Tb of margarine at a time and stir in until mixture comes together.

6. Line a baking tray with baking paper.


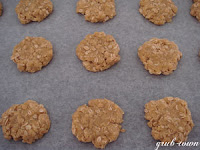
7. Roll dough into balls and gently flatten them with your hand.
8. Bake for 15-20 minutes or until golden. When biscuits are out of the oven, they are soft, however they harden upon cooling.

12 Jun 2009

lunch

What is sizzling away in the pancake pan?

Seasoned grated potato with a soft egg on top! XD This was inspired to me by a Japanese recipe found on Lettuce Club Net here. I couldn't get the grated potato to stick together with just seasoning and oil so I cracked an egg on top to bind it together. Slowly sizzling it to make the egg just cooked whilst the bottom on the grated potatoes gradually became crunchy!

Hehe, favourite part of eating this...

5 Jun 2009

あんこ - azuki paste v2

I wanted to make ohagi today so I needed a batch of azuki paste. I just altered by previous recipe which can be found here. As usual, making this needs overnight preparation and at least 1 hour of cooking since the the water needs to absorb thoroughly.

This filling can also be used as a filling in steamed buns (bao/ manju), dorayaki and in baked breads etc. This can be also be used as a spread on bread rolls and sandwiches.

The sugar added really depends on your taste. In most recipes, the sugar required is the same as the amount of azuki you use. however I find this too sweet to my liking. Don't limit your cooking/ baking to recipes, feel free to adapt to suit your taste. As said in ocrimono in their oyatsu palette 'There is no accounting for taste, so choose your own.' I really like this quote!

Oh! By the way, most of the photos look the same. You can't really expect much when your pretty much boiling beans in a pot of water. Enough of me talking, here is the recipe...

***
azuki paste v2

ingredients:
  • 250 grams of azuki beans
  • 3/4 cup raw sugar or to your own taste
    (white sugar can be used as well)
  • cold water for boiling
(200 grams of azuki beans to 1/2 cup sugar)
method:

overnight preparation:

1.Weigh the correct amount of azuki beans.

2.Wash under a strainer and soak in cold water overnight.

making the adzuki paste: first boil

3. Wash azuki beans again.

4. Place azuki beans in a small saucepan.

5. Fill saucepan 3/4 way up with cold water. Bring to a boil over high heat.
6. When the water boils, drain the water from the beans and replace with fresh water.

making azuki paste: second boil
7. Bring water to a boil again. Simmer beans on medium heat for 15 minutes.
8. Turn fire on low heat and simmer until beans are soft. (Approx. 10-15 minutes)
9. Add sugar and stir well. Turn fire to high heat until nearly all the water is evaporated.

Note: The beans will absorb some moisture after it has been removed from the fire. So make sure to leave some moisture in this step.
10. Turn fire on high heat. Mix and squash them into paste. (I think the whisk does a good job mashing the beans!)

Note: If your paste is too moist, return to fire and stir constantly to avoid burning.

Note: Chilling it, firms the paste.

3 Jun 2009

grub town

So where did the name "grub town" come from.

Well, I thought of this name quite a long time ago...one year (during my Year 10 days). You see, it was during one of those maths class, where the teacher didn't check our books and if we understood the process we didn't have to do much. Anyway I sat in the back row for bludging purposes...yes, I HATED maths last year and still do...didn't understand (or as lief92 said, I didn't want to understand it...yes he's probably on the right track there...)

One of the topics we studied was linear graphs and programming. HATED that topic...practically because I had no idea what the teacher was on about and kinda irritated the two geniuses in my class trying to explain to me. So I pretended to do the work. It's a miracle the teacher never found out I skipped like 2 whole chapters XD...too late for that now!

Well, with linear work we had to draw graphs and stuff, so I had my graph book. Started doodling on the front cover and eventually created labelled a whole town! At that time I started a windows live space but it was hard to use so I deleted it and put off the idea of blogging for a while.

Well, I recently picked up blogging again and I'm really addicted to it. XD That's a bad thing...but...yer...

Well I asked lief92 just then for the scan since I gave him the hard copy (I wonder if he still has it...)

grub town established on #010508

The creator, signing off!

Edit: So Lalarhs asked where did the name 'grub' come from. Well, Grub was one of the characters in one of Jackie French's chapter books that I read in primary school. I though Grub was a cool character and pretty much nicknamed myself from her character. I don't think I can be such a genius inventor like Grub though.

1 Jun 2009

pan fried tomato pasta

Exams officially start today and what a good time to be cooking when I should be studying very hard XD. Cooked the same dish on Saturday...only that one was more burnt XD. Did a remake for the photo instructions and for lunch. My dad came home and he ate some too...oh well I did make some extra. :)

***
pan fried tomato pasta

ingredients:
serves 1.5 people ;)

  • 1 cup of corkscrew pasta
  • 4 cherry tomatoes
  • 3 frankfurter sausages
  • 1/2 onion
  • 1/3 cup frozen peas
  • 3 Tb oil
  • tomato sauce
  • pepper, salt, chicken powder
  • dash of dark soy sauce (optional)
  • water for boiling
method:

1. Bring a small saucepan of water to the boil.

2. Prepare the other ingredients while waiting for the water to boil.
  • Wash and slice the cherry tomatoes, de-seed if desired
  • Slice frankfurters
  • Peel and slice the onion. Separate them.
  • Unfreeze frozen peas under water.
3. Add 1/2 tsp salt and 1 tsp chicken powder to the hot water before pouring in pasta. In the last few minutes of pasta cooking time, pour in the peas.

4. Boil pasta until al dente. Drain pasta and peas and rinse under cold water. Drain pasta.

5. Heat oil in a fry pan/ mini wok. Brown the onions lightly.

6. Add in the sliced frankfurters, cook until lightly browned.

7. Pour in the drained pasta. Stir fry for a while.

8. Squeeze a criss cross pattern of tomato sauce over pasta. Add tomato sauce to your taste. Season with pepper, salt and chicken powder. Add in cherry tomatoes.

9. Pour in a dash of dark soy sauce. Stir fry until sauces have blended in.